
hashmap 之链地址法
1、定义哈希表 及 哈希桶 结构体
#include 2、创建指定大小的哈希表
// 创建指定大小的哈希表
HashMap* createHashMap(int size) {
    HashMap* map = (HashMap*)malloc(sizeof(HashMap));
    map->size = size;
    map->buckets = (Node**)calloc(size, sizeof(Node*));
    return map;
}
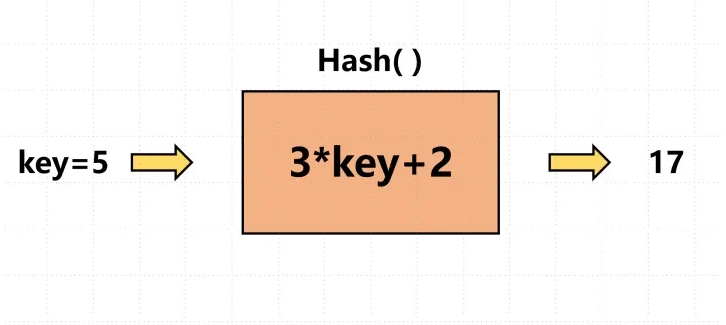
3、哈希函数
// 哈希函数
int hash(HashMap* map, char* key) {
    int sum = 0;
    for (int i = 0; i return sum % map->size;
}
4、HashMap put操作
void put(HashMap* map, char* key, int value) {
    Node* newNode = (Node*)malloc(sizeof(Node));
    newNode->key = strdup(key);
    newNode->value = value;
    newNode->next = NULL;

    int index = hash(map, key);
    Node* curr = map->buckets[index];

    if (curr == NULL) {
        map->buckets[index] = newNode;
    } else {
        while (curr->next != NULL) {
            curr = curr->next;
        }
        curr->next = newNode;
    }
}
5、HashMap get操作
// 从哈希表中获取指定键的值
int get(HashMap* map, char* key) {
    int index = hash(map, key);
    Node* curr = map->buckets[index];

    while (curr != NULL) {
        if (strcmp(curr->key, key) == 0) {
            return curr->value;
        }
        curr = curr->next;
    }

    return -1;  // 如果没有找到,返回 -1
}
6、释放内存
// 释放哈希表的内存
void freeHashMap(HashMap* map) {
    for (int i = 0; i size; i++) {
        Node* curr = map->buckets[i];
        while (curr != NULL) {
            Node* temp = curr;
            curr = curr->next;
            free(temp->key);
            free(temp);
        }
    }
    free(map->buckets);
    free(map);
}
7、main方法测试
int main() {
    HashMap* map = createHashMap(10);
 char a[] = "apple",b[] = "banana",o[] = "orange",w[] = "watermelon";
    put(map, a, 1);
    put(map, b, 2);
    put(map, o, 3);

    printf("Value of 'apple': %d\n", get(map, a));
    printf("Value of 'banana': %d\n", get(map, b));
    printf("Value of 'orange': %d\n", get(map, o));
    printf("Value of 'watermelon': %d\n", get(map, w));
    freeHashMap(map);

    return 0;
}
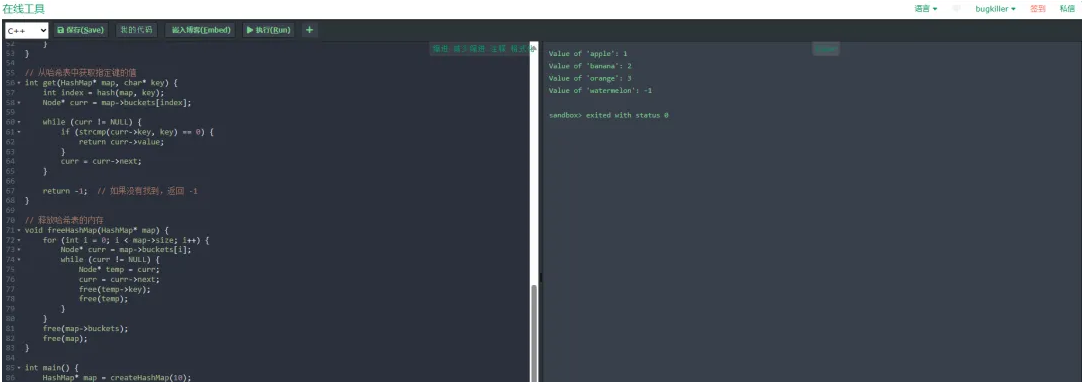
运行结果:

result
该HashMap 使用了链地址法来处理冲突,即在哈希桶中的每个位置存储一个链表,哈希冲突时将键值对添加到链表的末尾。
createHashMap 函数创建了一个指定大小的哈希表,put 函数向哈希表中插入键值对,get 函数从哈希表中获取指定键的值,freeHashMap 函数用于释放哈希表的内存。在 main 函数中我们可以看到如何使用这个 HashMap 来存储和获取键值对的方式。
以上就是良许教程网为各位朋友分享的Linu系统相关内容。想要了解更多Linux相关知识记得关注公众号“良许Linux”,或扫描下方二维码进行关注,更多干货等着你 !


 微信扫一扫打赏
 支付宝扫一扫打赏

.png)
